KINIRO ULTRA Programming Guide

Disclaimer: This is a first draft and will be amended if required.
Requirements
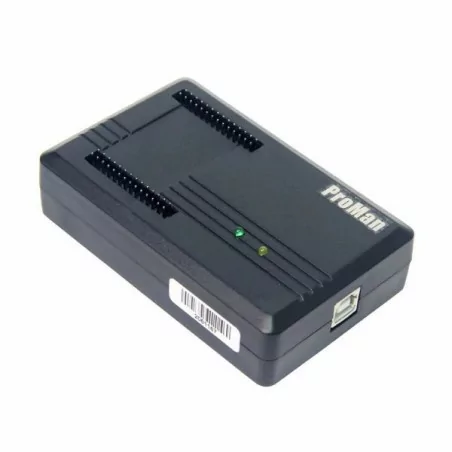
- Proman (TL86 plus) Programmer (Must match picture) and software (download)
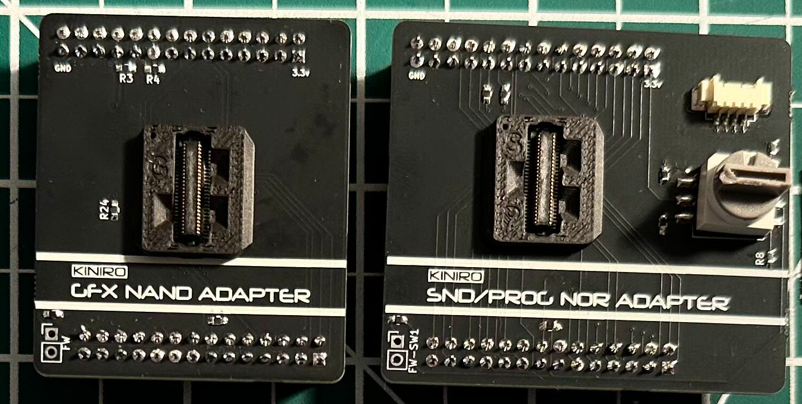
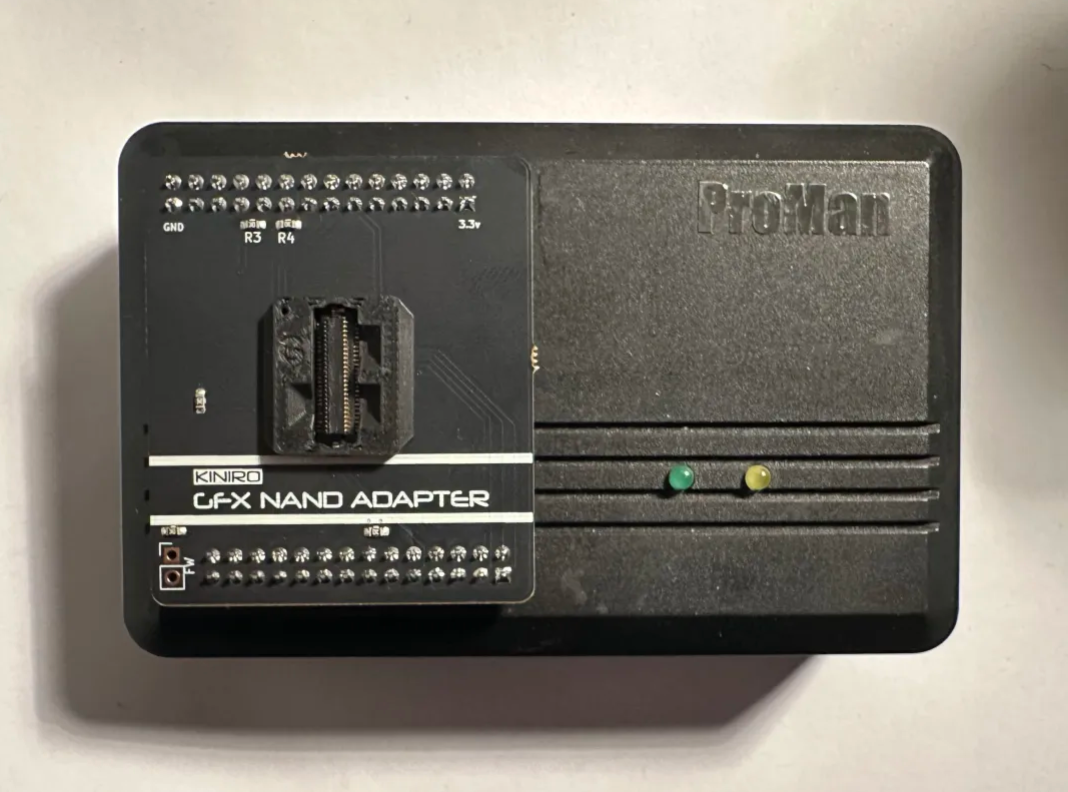
- KINIRO NAND Adapter
- KINIRO NOR Adapter
-
Up to 16 roms of your choice. These will not be provided.
-
Ability to run python scripts
Guide
Before beginning, make note of what roms you want in each slot. It’s easy to lose track of where you’ve installed each rom. This process can take a while, watch some tv or play some OSRS in the background.
Program NOR (U4)
Rom Preparation
As we are not using the original(very old and obsolete..) GFX chips, your U4 program roms will have to be patched to remove the NAND ID check that is performed by the game. You can find details on this here: U2 Replacement.
Programming
If you ever plan to change a game in one of the slots, you will unfortunately have to perform all steps below and reprogram all 16 slots. This only applies to the NOR modules
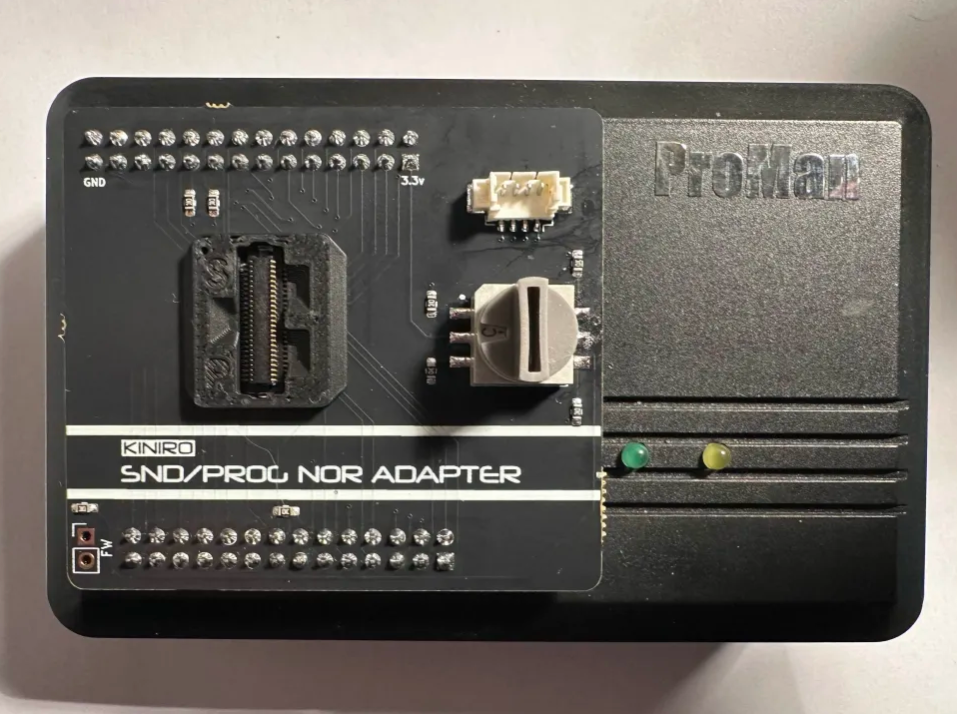
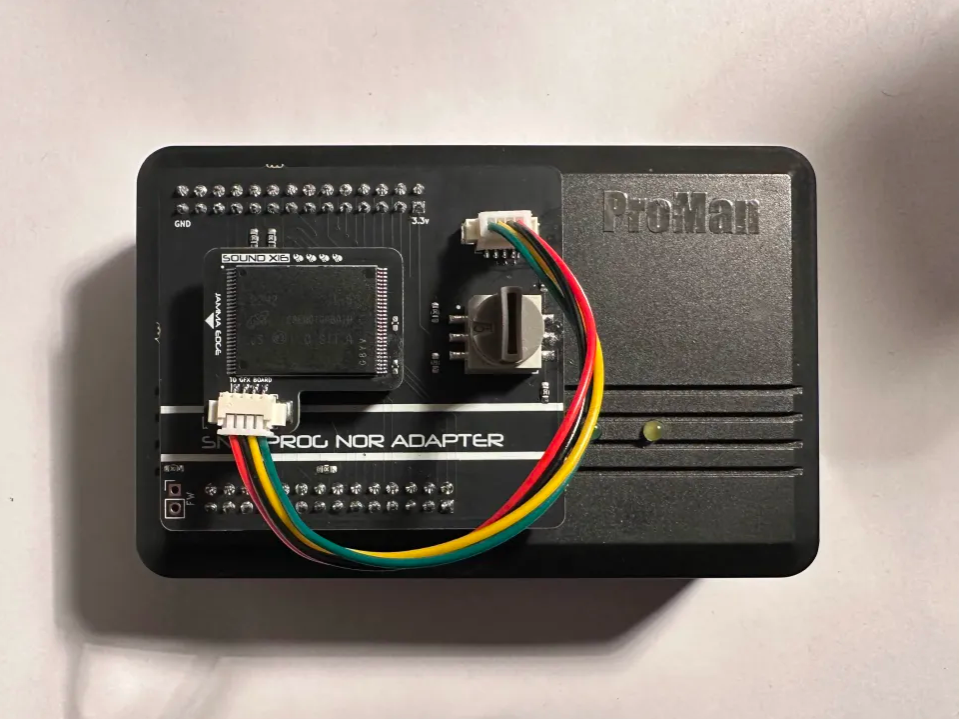
1) Unplug your programmer and install the KINIRO NOR Adapter as shown.
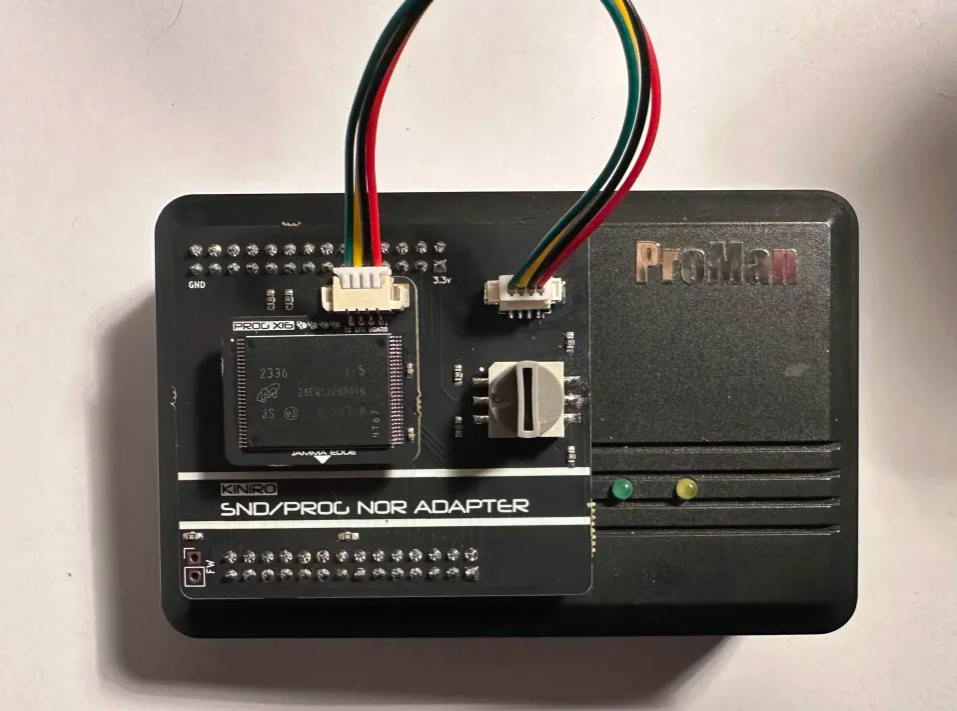
2) Connect the cable of the Program x16 module into the connector on the adapter, then connect the module itself to the adapter.
3) plug your adapter into your PC and open NOR063_Beta_D.exe. Press “Scan” to make sure you programmer is detected.
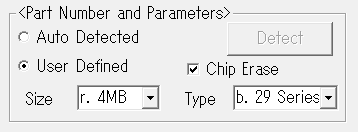
4) Under “Part Number and Parameters” Select “User defined” and set the following:
- Check “Chip Erase”
- Set Size to “4MB”
- Set Type to “b. 29 Series”
5) Press “EraseChip” to clear the NOR flash. This will clear the entire chip, all 16 slots.
Repeat the following steps for each slot to program the entire module. After this point, if you press “EraseChip” or “Smart key” you will wipe the entire chip and have to reprogram any previously programmed slots. Each slot should take just under 1 minute to program.
Be Careful! Any mistake here, such as flashing the wrong file or forgetting to move the rotary dip to the next slot, will require you to start over!
6) Move the rotary switch to the slot you want to program
7) Under “Erase and Program” press “File to Program” and select your patched U4 rom you wish to program, the file should be 2,048 KB for CV1000B games, or 4,096 KB for CV1000D games.
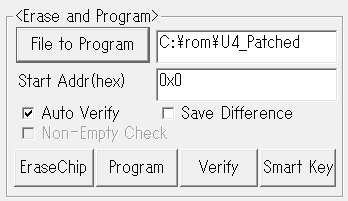
8) DO NOT PRESS SMART KEY. This will erase the entire chip. Make sure “Auto Verify” is checked and press “Program”. The rom will be flashed and verified. If you encounter any verification errors, unplug the programmer, reseat the connection and try again.
After all 16 slots are finished, please unplug the programmer from your PC before disconnecting the pcb. You are now done with the Program x16 module.
Sound NOR (U23, U24)
Rom Preparation
Before you begin, you will have to merge the 2 sounds dumps into 1 file. You can do this yourself using my merger script download.
To use my merger script, extract both files from the zip to a directory, and select both u23 and u24 dumps (in order) and drag them together onto the merger.bat file. This will execute a powershell script and merge the 2 files. The resulting merged file will be named merged-<parent_folder_name>_<u23_file_name>_<u24_file_name> eg: merged-MyGame_u23_u24 and will be saved to the same folder location of u23 and u24. If U24 is named before U23 you have merged the files in the wrong order. Please reselect u23 and u24 in order and perform the merge again.
Some dumps have some extra padding at the end making it larger than 4mb, for mame this isn’t an issue but for us this will offset our U24 sound data by the padded amount, causing bad reads. My script will automatically trim each to the correct size ensuring only the first 4mb of each sound rom dump is used.
Programming
If you ever plan to change a game in one of the slots, you will unfortunately have to perform all steps below and reprogram all 16 slots. This only applies to the NOR modules
1) Unplug your programmer and install the KINIRO NOR Adapter as shown.
1) Connect the cable of the Sound x16 module into the connector on the adapter, then connect the module itself to the adapter.
1) plug your adapter into your PC and open NOR063_Beta_D.exe. Press “Scan” to make sure you programmer is detected.
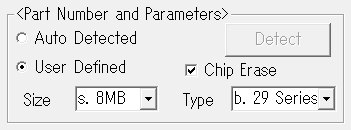
2) Under “Part Number and Parameters” Select “User defined” and set the following:
- Check “Chip Erase”
- Set Size to “8MB”
- Set Type to “b. 29 Series”
5) Press “EraseChip” to clear the NOR flash, this will clear the entire chip, all 16 slots.
Repeat the following steps for each slot to program the entire module. After this point, if you press “EraseChip” or “Smart key” you will wipe the entire chip and have to reprogram any previously programmed slots. Each slot should take about 1.5 minutes to program.
Be Careful! Any mistake here, such as flashing the wrong file or forgetting to move the rotary dip to the next slot, will require you to start over!
1) Move the rotary switch to the slot you want to program
2) Under “Erase and Program” press “File to Program” and select your merged U23 and U24 rom file you wish to program, the file should be 8,192 KB in size.
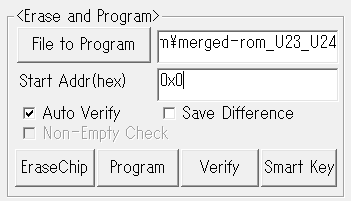
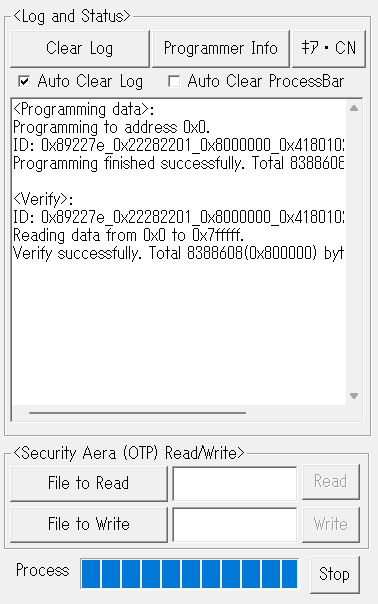
1) DO NOT PRESS SMART KEY. This will erase the entire chip. Make sure “Auto Verify” is checked and press “Program”. The rom will be flashed and verified. If you encounter any verification errors, unplug the programmer, reseat the connection and try again.
After all 16 slots are finished, please unplug the programmer from your PC before disconnecting the pcb. You are now done with the Sound x16 module.
GFX NAND (U2)
Graphics roms do not require any rom preparation, we can jump straight to programming
Programming
1) Unplug your programmer and install the KINIRO NAND Adapter as shown.
1) Connect the Graphics x16 Module to the adapter with its ribbon cable.
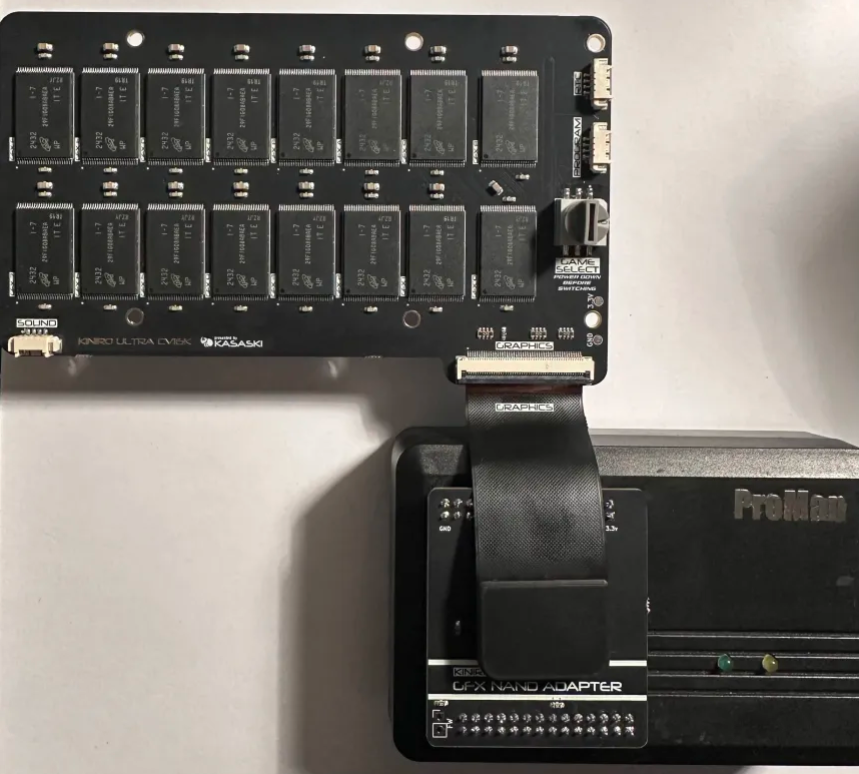
1) plug your adapter into your PC and open NAND063_Beta_D.exe. Press “Scan” to make sure you programmer is detected.
2) Under “Part Number and Parameters” Select “User defined”, Click “Define” to open the define dialogue and set the following:
- Page Data Size: “<3> 2048”
- Page Spare Size: “<2> 64”
- Pages per Block: “<2> 64”
- Chip Select Count: “<1> 1”
- Blocks Per Chip Select: “<2> 1024”
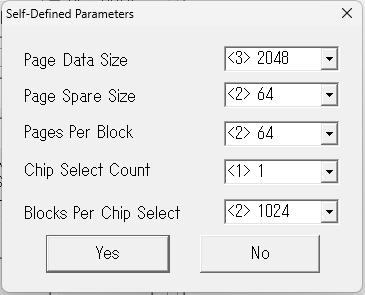
Press “Yes” to close the dialogue. Leave all other settings as default.
Repeat the following steps for each slot to program the entire Graphics module. Each slot takes approximately 2-3 minutes to program.
5) Move the rotary switch to the slot you want to program
6) Under “Erase and Program” press “Open” and select your U2 rom you wish to program, the file should be 135,168 KB in size
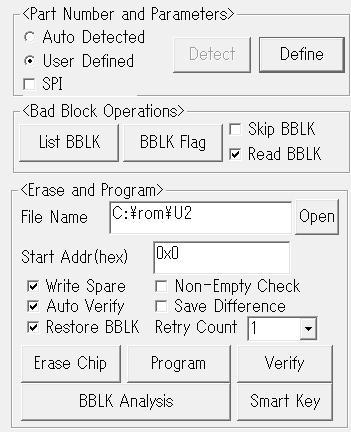
1) Press “Smart Key” to program the NAND flash. The software will erase, write the rom, then verify its written correctly. If you encounter any verification errors, unplug the programmer, reseat the ribbon connector and try again. If issues persist, the nand flash you are writing to may have developed a bad block, please see the following section on how to deal with this.
Once you are done with all 16 slots please unplug the programmer from your PC before disconnecting the GFX pcb.
Dealing with Bad Blocks
Very rarely (hopefully never) you may encounter bad blocks, unfortunately this is the nature of nand flash. From factory these bad blocks are usually marked but sometimes a block may begin to deteriorate on their own resulting in verification errors. If you are encountering verification failures many times on the same block it may be bad. Usually most systems integrate some sort of error correction to battle this deterioration but The CV1000 does not do this. Instead the roms contain a predetermined bad block table, with the data modified to write around the bad blocks. Cave would check each flash for bad blocks and modify the rom before flashing. Luckily we can also do this. Using u2tool.py we can modify the U2 rom, marking a block as bad in the rom’s bad block table, and write the data that would’ve gone there to another area in the flash, avoiding the bad block entirely.
Requirements
1) Copy your clean U2 dump into the same directory as u2tool.py
2) Open command prompt in this directory, verify python is installed correctly by running python --version
3) run u2tool.py with the following:
python u2tool.py adjust <clean file name> --outfile=<output file name> --bad_blocks=<list of bad blocks>
For example, if the clean file is named u2_clean and your nand has bad blocks at 314 and 532 you would run:
python u2tool.py adjust u2_clean --outfile=u2_adjusted --bad_blocks=314,532
1) You can now flash u2_adjusted using the GFX programming steps above.
Re-Assemble
Now thats you’ve programmed your modules, youll need to re-assemble the multi. Please refer to the final section in my installation guide
Notes:
After re-assembling and testing that your games boot, if all you see is garbled graphics when selecting a specific slot, please reprogram the GFX U2 nand for that slot. If the issue persists or instead of garbled graphics you see nothing, you may have programmed an incorrect or unpatched file to u4. Please reverify the correct files were flashed to the slot in the programming software.
To register for interest in the kiniro project please fill out the survey!